Sunday, May 10, 2015

Monster Bond System and Perfect Bond List

The game has developed a new system that changes the game greatly. It is called as bond system. If you ask me to explain it, I'd say it's like "equipping one of your summoned monsters (sub monster) to your monsters in formation (main monster)".

There are 3 types of monster bond, and they are:
  • Normal bond: Bond between any monsters. The main monster gains 5% stats of the sub monster.
  • Elemental bond: Bond between monsters that have same element. The main monster gains 10% stats of the sub monster.
  • Perfect bond: Bond between a monster and its certain pair. A monster that has perfect bond with a certain monster has "B in blue circle" pattern on the monster. The main gains 20% stats of the sub monster and gains a new skill.


White Wolf Queen with "B in blue circle" pattern
She has perfect bond with Great Beast Draco


Important notes:
  • Most (or maybe all) of sub perfect bond monsters are last form monsters
  • The sub monster should be at least at half of its max level to be "equipped" to the main monster (if it has max Lv 80, it should be at Lv 40 to be used)
  • Main perfect bond monsters don't need to be at last form since they already have the bond pattern in their baby forms
  • Making bond / adding sub monster as bond to your main monster in teams will add more BP (+1~4 BP, depending on how strong the sub monster is)


When choosing sub monsters for the White Wolf Queen, Great Beast Draco gives the highest stats points thanks to perfect bond (+20% of sub monster's stats)


So, that you already understand the bond system, here is what you need!

PERFECT BOND LIST:
Main monster (Sub monster): bond skill

RED ELEMENT:
  1. Fire Wyvern (Ultimate Thunder Drake 8*): Increases ATK of front line monsters by 20%
  2. Thunder Drake (Ultimate Volcano Wyrm 8*): Increases ATK of itself by 45%
  3. Volcano Wyrm (Ultimate Fire Wyvern 8*): Increases HP of itself by 45%
  4. Beach Kusanagi (Beach Caduceus 9*): Increases ATK of all allies by 5%
  5. Lion Rider 4* & 5* [Red] (King Chimera 6* [Red]): Increases chance for monsters to appear to catch by 3% of their base chance
  6. Mermaid [Red] (Archangel Fish 6*): Increases coin gain by 10%
  7. Droid Queen [Red] (Arch Knight Bot 6* [Red]): Stuns foe's monster for 4 turns
  8. Great Fire (Great Spirit Knight 9* [Red]): Sweeping damage with 50% ATK on first attack
  9. Spirit Knight [Red] (Royal Servant of Fire 5*): Increases ATK of itself by 15%
  10. Meteora (Fire Dragon Maiden 9*): Sweeping damage with 50% ATK on first attack
  11. Hobbit [Red] (Great Dragon 6* [Red]): Increases HP of Red ally monsters by 20%
  12. Slime [Red] (Hobbit Prince 8* [Red]): Increases HP of Red ally monsters by 15%
  13. Sagesnake [Red] (Black Widow Queen 8*): Increases HP of front line monsters by 20%
  14. Little Witch [Red] (King Dullahan 6*): Increases ATK of itself by 60%
  15. Tiger Girl [Red] (King Chimera 6* [Red]): Increases EXP gain by 10%
  16. Katanafox [Red] (Snow Queen 8*): Increases ATK of backline monsters by 20%

GREEN ELEMENT:
  1. Wood Salamander (Ultimate Stone Salamander 8*): Absorbs 40% damage
  2. Stone Salamander (Ultimate Wood Salamander 8*): Reflects 50% damage when getting hit
  3. Beach Caduceus (Beach Valkyrie 9*): Increases HP of all allies by 5%
  4. Lion Rider 4* & 5* [Green] (King Chimera 6* [Green]): Increases chance for monsters to appear to catch by 3% of their base chance
  5. Mermaid [Green] (Archangel Fish 6*): Increases coin gain by 10%
  6. Droid Queen [Green] (Arch Knight Bot 6* [Green]): Stuns foe's monster for 4 turns
  7. Great Earth (Great Spirit Knight 9* [Green]): Absorbs 40% damage
  8. Spirit Knight [Green] (Royal Servant of Rock 5*): Increases HP of itself by 15%
  9. Zahhak (Earth Dragon Maiden 9*): Reflects 50% damage when getting hit
  10. Hobbit [Green] (Great Dragon 6* [Green]): Increases HP of Green ally monsters by 20%
  11. Slime [Green] (Hobbit Prince 8* [Green]): Increases HP of Green ally monsters by 15%
  12. Sagesnake [Green] (Black Widow Queen 8*): Increases HP of front line monsters by 20%
  13. Little Witch [Green] (King Dullahan 6*): Increases ATK of itself by 60%
  14. Tiger Girl [Green] (King Chimera 6* [Green]): Increases EXP gain by 10%
  15. Katanafox [Green] (Snow Queen 8*): Increases ATK of backline monsters by 20%

BLUE ELEMENT:
  1. Beach Valkyrie (Beach Kusanagi 9*): Increases HP of all allies by 5%
  2. Lion Rider 4* & 5* [Blue] (King Chimera 6* [Blue]): Increases chance for monsters to appear to catch by 3% of their base chance
  3. Mermaid [Blue] (Archangel Fish 6*): Increases coin gain by 10%
  4. Droid Queen [Blue] (Arch Knight Bot 6* [Blue]): Stuns foe's monster for 4 turns
  5. Great Water (Great Spirit Knight 9* [Blue]): Piercing damage
  6. Spirit Knight [Blue] (Royal Servant of Water 5*): Increases ATK & HP of itself by 9%
  7. Leviathan (Ice Dragon Maiden 9*): (still a prediction)
  8. Hobbit [Blue] (Great Dragon 6* [Blue]): Increases HP of Blue ally monsters by 20%
  9. Slime [Blue] (Hobbit Prince 8* [Blue]): Increases HP of Blue ally monsters by 15%
  10. Sagesnake [Blue] (Black Widow Queen 8*): Increases HP of front line monsters by 20%
  11. Little Witch [Blue] (King Dullahan 6*): Increases ATK of itself by 60%
  12. Tiger Girl [Blue] (King Chimera 6* [Blue]): Increases EXP gain by 10%
  13. Katanafox [Blue] (Snow Queen 8*): Increases ATK of backline monsters by 20%

WHITE ELEMENT:
  1. White Wolf (Great Beast Draco 6*): Increases chance for monsters to appear to catch by 2% of their base chance
  2. Seiryu (Ultimate Jinlong 8*): Increases ATK of itself by 45%
  3. Glaurung (Ultimate Seiryu 8*): Increases ATK of White ally monsters by 15%
  4. Lion Rider [White] (King Chimera 6* [White]): Increases chance for monsters to appear to catch by 3% of their base chance
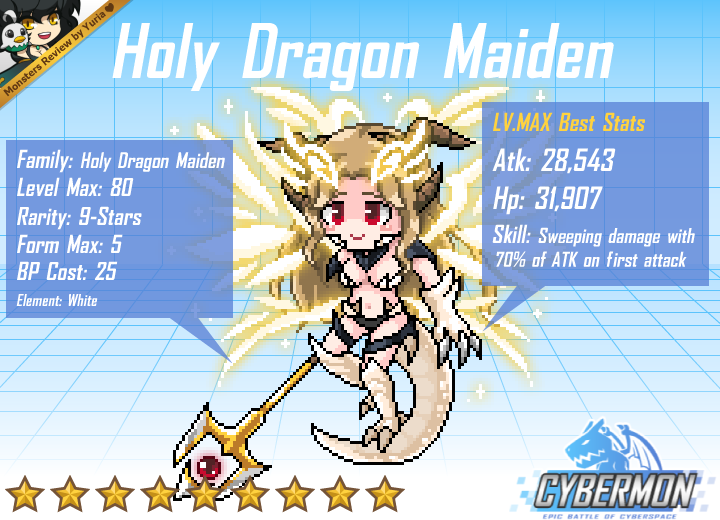
  5. Space Naga (Holy Dragon Maiden 9*): (still a prediction)
  6. Hobbit [White] (Great Dragon 6* [White]): Increases HP of White ally monsters by 20%
  7. Sagesnake [White] (Black Widow Queen 8*): Increases HP of front line monsters by 20%
  8. White Witch / Witch of Sunlight (King Dullahan 6*): Increases ATK of itself by 45%
  9. Katanafox / Kyubi [White] (Snow Queen 8*): Increases ATK of backline monsters by 20%
  10. Queen of Holiness (Great Spirit Knight 9* [White]): Absorbs 40% damage
  11. Yuki Onna (Holy Silver Wolf 8*): Increases ATK of itself by 30%
  12. Silver Wolf (Ultimate Yuki Onna 9*): Increases HP of itself by 30%
  13. Mirror Maiden (Lord Knight Doll 6*): Increases Guild Gem gain by 7%

BLACK ELEMENT:
  1. Black Cat (Great Parrot Wyrm 6*): Increases coin gain by 10%
  2. Yamiryu (Ultimate Skeleton Dragon 8*): Increases HP of itself by 45%
  3. Shenlong (Ultimate Yamiryu 8*): Increases HP of Black ally monsters by 15%
  4. Lion Rider [Black] (King Chimera 6* [Black]): Increases chance for monsters to appear to catch by 3% of their base chance
  5. Hollow Komodo (Dark Dragon Maiden 9*): (still a prediction)
  6. Hobbit [Black] (Great Dragon 6* [Black]): Increases HP of Black ally monsters by 20%
  7. Sagesnake [Black] (Black Widow Queen 8*): Increases HP of front line monsters by 20%
  8. Black Witch / Witch of Nightfall (King Dullahan 6*): Increases ATK of itself by 45%
  9. Katanafox [Black] (Snow Queen 8*): Increases ATK of backline monsters by 20%
  10. King Of Darkness (Great Spirit Knight 9* [Black]): Damage all foes using 30% of ATK
  11. Hobbit [Black] (Great Dragon 6* [Black]): Increases HP of Black ally monsters by 20%
  12. Mirror Maiden (Blood Doll 6*): Increases Guild Gem gain by 7%

Thursday, March 19, 2015

Bazaar System Guide

Bazaar system is a trading system in Cybermon game where you can trade your monsters for BC (Bazaar Coins) and other monsters. These are important things you need to know:
  • The currency in bazaar is Bazaar Coin (BC). The way to obtain BC is only by selling your monster in BC or buying BC with golds. You get BC three times of golds you pay. For example, 200 golds will get you 600 BC.
  • You can only trade your monster to a monster with same tier (9* family monster to a 9* family species)
  • You can only trade your monster to any monster with same rarity, except to an exactly same monster (same both color and species)
  • You can only sell your monster for BC in their own price range. But most of 8-star and 9-star monsters don't have price range (1-999,999 BC)
  • The monsters you sell in BC will be sold in higher price due to tax once they're available. The tax varies from 3% to 10% depending on the price you put on them.
  • Trading your monster to another monster will get you monster with various stats and levels, depending on the monster the trader gave to you. So if you don't like monster that doesn't have best stats (BS), don't dare to trade your monster with another monster. You may get monsters with low stats.

How to get BC? Here are my hints.
  • Search for strong and exotic baby monsters. Not many people want to buy BC via golds, so BC will run out if no player wants to buy golds. But, this game has some players who collect rare or strong monsters and they would buy golds to get the exotic monsters they're searching for. Most of monsters they are searching for are 9* family species, for example: Dungeon Elf, Kirin, Scorpion, Bastet, Ocean Nymph. These are monsters you can still catch with Lv 50 and 90 requirements that are still being sold well at bazaar. Legendary monsters like Phoenix, Time Keeper, Hollow Komodo, Lamia, are exotic monsters too. But, since they can't be found in normal dungeons, you won't easily get these monsters.
  • Sell your monsters with lowest price in bazaar. Well, who wants to buy monster with higher price unless if it has better stats or higher level, anyway?
  • Make sure you asked some people first what price to give for monster you have that has low stock, or isn't found in bazaar. It might be a rare monster that is worth high price. Don't haste and sell it in your own price or you'll regret it later.

How to search for monsters you want?
  • If you want a best stats monster, better sell the monster you have in BC, then use the BC to buy the monster you want.
  • Trade monsters in 1st form since all of them are guaranteed to be at best stats. The higher the rarity, the higher the risk. You can even get monsters with around 60% of original stats if the trader has bad stats monster.
  • Max level the monster you want to trade if the monster you have is quite less rarer than the monster you're looking for, so the owners of monsters you're searching for will have consideration to trade his monster with yours.

Basic bazaar natural laws:
  • People will always search for cheapest prices
  • The more people have a certain species of monster in their team, the lesser price it has
  • Price of a legendary / rare monster will drastically drop soon when the collector finished evolving it to its last form
  • Price of a legendary monster will drop in "Legendary Hunting" event where some or many people will be able to catch legendary monsters, depending on numbers of monsters they obtain in the event
  • Best stats or max leveled monster is worth higher price
  • Price of monsters will globally drop due to less players want to buy monsters in BC as time flows

Wednesday, July 2, 2014

Athon's 8-star Monsters

There are some great 8-star monsters found in the stages of Athon World. Here, I'll only tell you which monsters are very useful for each element and where to catch them.


1. Stone Salamander


This stone dragon has great potential to be a tanker. So for tanking, it is the best among all 8-star green monsters. It has 23,237 HP at max level with best stats. So, with its own self HP buff, it will have 37,180 HP. Very bulky, almost as bulky as Succubus Queen.


You can find baby forms of this dragon at Valley-3 and Valley-Boss stage.


2. Water Wyrm


Water Wyrm has high HP, which is more than 24,000 HP. It provides 20% HP for Blue allies, so it is a must for a blue player to get one. Because of its high HP, it can be placed at front line as tanker.


Water Wyrm babies can be found in Underwater-3 and Underwater-Boss stage.


3. Fire Wyvern


Despite of having cool design, this blazing dragon is an awesome attacker. It has more than 24,000 ATK at max level with best stats. It increases 15% ATK of all ally monsters. It's a hard hitter, so place it at back line.


The baby forms of this fire dragon can be found at Volcano-3 and Volcano-Boss stage.


4. Cerberus


Same like Fire Wyvern, this Cerberus is a great attacker, but it also has great HP. His ATK and HP are around 23,000 and 21,000 at max level with best stats. Like Fire Wyvern too, it increases ATK of all allies by 15%. This monster is the counterpart of Seraphim.


As we know, 1st and 2nd forms of this monster can be found at Temple of Evil, maybe starting at 30th floor.


5. Metalica


This robotic metal dragon has highest base HP among all 8-star Athon monsters, it's around 27,000. It gives 15% HP to all allies. This tanker is really good to tank many hits at front line. It will be perfect if used with Olivia character with +20% HP for White allies as her main skill.


Baby forms of Metalica can be found at Lost City-3 and Lost City-Boss stage.

And then...

BONUS!

Well, I guess this one is only for fun. Nice edit you did there!

Tuesday, July 1, 2014

Team Making Guide

There are basics that we should know about formation. As we know, there are six slots in each formation to use. 3 slots for front line and 3 slots for back line.


We must know that each position is the best for certain monster. We should do some analysis when fighting opponent to understand more about this battle position.

Well, let's say that each slot has its own number, so I can explain it one by one.


Slot 1
Monster at slot 1 will always be attacked first, no matter if you get first or last turn. So opponent always places strong attacker at the opposite side. So you should place monster that can take massive hit. This slot is for the bulkiest tanker you have.

Slot 1 monster will always be attacked before attacking.

Slot 2
Monster at slot 2 can attack first if you get first turn and will attack after opposite foe attacks if you get last turn. So you should place your bulky tanker here too. But placing bulkiest tanker at slot 1 is the priority if you already have at least 2 tankers. This slot can be either for semi tanker or tanker.

The slot 2 tanker can still take out the enemy in one hit.

Slot 3
Monster at slot 3 will always attack first before getting attacked, so this slot should be filled by semi tanker monster that can hit the opposing foe hard. Behemoth is example of perfect semi tanker which also has good attack points. So in battle, it will 1-hit KO the opposing foe at front line, but after getting hit by the monster in the back, Behemoth won't be KO and can hit at least once more (to the monster that attacked it) so it can take out minimum of 2 enemies. So this slot is a place for hitter with high HP, or semi tanker.

Slot 3 monster will always attack first, whether you get first or last turn.

Slot 4
Slot 4 monster will always get attacked after attacking once if the tanker in front of it can't take out the opposing enemy in 1 hit. So the monster in this slot won't survive very long. Place hitter monster here. But since the monster here won't survive very long, you must place your most dangerous hitter in other slot than this one. This slot can be placed with your 3rd strongest hitter.

Slot 4 monster only has opportunity to do 1-2 attacks as hitter and KO the monster that can't be 1-hit KO'ed by the monster in front of it (slot 1).

Slot 5
Monster in slot 5 is often the one last survivor in battle, so it can do most attacks among all monsters in your team. Place your 1st strongest hitter here, it will be a serious threat for enemy.

Slot 5 will always be one of the last survivors.

Slot 6
You know that the monster in front of this slot is a semi tanker. If your semi tanker is KO after hitting once because of being hit by opposing back line enemy, the monster in this slot will do the rest of the job to clear all opposing monsters before enemies do. After clearing all opposing foes, it can sweep the remaining foes at the opposite of your pure tanker (opposite foes of slot 1). Place your 2nd strongest hitter here.

Slot 6 monster can be last survivor, so place 2nd strongest hitter in it.

That's all for formation guide, I hope this helps you to choose which monster to place on each slot!

Best Stats Making Guide

BEST STATS!
To have good team and to sell monsters at standard and high prices, we need to make monster with stats as high as we can. Higher stats will make a monster stronger and more attractive to be bought in the bazaar. So, we need to learn about best stats.
Best stats monsters have more appeal for people, so they get sold faster.

What is BEST STATS?
As the words say, best stats means the monster has the best stats it can have at the max level, so the evolved monster has the HIGHEST stats retained. Non-best stats monsters are only produced from imperfect evolution. Monsters from tickets and combinations, or babies (1st form) always have BEST STATS.


Best stat is obtained through highest stats retained from evolving.


After evolving, the evolver monsters' retained stats (10% for max leveled and 5% for otherwise) are inherited to the newborn evolved monster.

BEST STATS always attracts people to have the monster at bazaar, because BEST STATS means PERFECT STATS or NON-REDUCED STATS. So monsters with BEST STATS are worth more price.

Best stats is also useful sometimes in battle.


What is Imperfect Evolution?
I define imperfect evolution as evolution that produces NON-BEST STATS monsters. If the monsters used from evolving have non-best stats or level that is not maxed yet, the next evolution onwards won't ever produce a BEST STATS monster.

So, how to make BEST STATS monster?
You should have 2 same monsters with both BEST STATS and maximized level.
Without it you won't produce best stats monster.

MAX LEVEL & BEST STATS + MAX LEVEL & BEST STATS = BEST STATS!!
MAX LEVEL & BEST STATS + NOT MAX LEVEL & BEST STATS = NON-BEST STATS
MAX LEVEL & BEST STATS + MAX LEVEL & NON-BEST STATS = NON-BEST STATS


How if I don't have many gems? I'm lack of them... So I can't make BEST STATS monster.

Then you don't need to make best stats, but at least make monster with stats as high as you can make.
At 1st evolution you may maximize only 1 monster and leave the other one at Lv 1. Make sure the evolver is the Lv 1 monster so you won't waste gems if you fail evolving and lose the evolver monster. Max leveled monster will have its 10% stats retained and not-max leveled will have its 5% stats retained.

If you really lack of gems, you can evolve 1st form monsters at level 1, but only up to 2nd or 3rd form, so at last form it will still have high until almost perfect stats.

I have no calculation for stats retained and what would the stats be if you don't upgrade the monster at certain form, you can search for it or ask it to experienced evolver players. But I still suggest you to make a monster with stats as high as possible so it's worth more BC and it will be stronger than others, although it has only 1-100 stats difference at the end.

Other Guides

There are many other guides you can see here! Please click any link below to see the guides!

1. Best Stats Making Guide
2. Team Making Guide

Event Monsters

We know that there are monsters that we can only catch in event and all of them are 8-star and 9-star monsters. Event monsters can be obtained through 2 kinds of event, those are Raid Boss Event and Special Dungeon Event.

1. Raid Boss Event

This event is an event where you can't catch the monsters in the event dungeon, but you can gain diamonds to be traded with chests. The chests often give discs and gems, and the event monster itself. The plus points we can see from this event are:
  • You can get tons of discs and gems
  • You can get event monsters without wasting Master Cubes
There are 2 kinds of player in this event, the adventurers and helpers.
  • Adventurers walk in the event dungeon and gain points from fighting monsters there and gain extra points from Boss Founder Bonus at cost of more energy gallons, bottles, or cans. Adventurers can get evo key, one of raid boss unique features, starting at 30th floor and above, which evolves all your monsters to maximum forms and maximum levels (free for 3 minutes in first try, then costs 20 golds after that).
  • Helpers will only help adventurers to beat the boss they found so the helpers will get points too. But they can't experience evo key feature!
Both of them get benefits so attending this event is fun.


2. Special Event Dungeon

This event is "catch oriented" where players must go to Endless Floor (starting after finishing the 100th floors) to catch the 9-star babies with Master Cubes they have. So people who don't go to the dungeon and walk around won't get any event points or event monsters.

But since this event allows you to catch monsters, it's easier for players to collect 9* babies than raid boss (which depends on your luck whether you'll get monster from chest or not).


The Event Monsters

So now we can explore about the event monsters themselves. There are many event monsters created by GM so far. These are the 9* main event monsters.
  • Crystal Dullahan
  • Iron Maiden
  • Behemoth
  • Spirit Knight
  • Gigas
  • Marionette
  • Dragon Maiden

1. Crystal Dullahan

Crystal Dullahan is a White monster with skill that decreases HP of all foes by 15%. It has synergy with other White monsters such as Holy Spirit (Holiness) and Dragon Maiden to create a multi-hitter team. Having high HP makes it having great combination with Olivia character, who increases HP of White monsters by 20%.


2. Iron Maiden

Iron Maiden is a Black event monster that decreases ATK of all foes by 15%. It has high ATK and good HP, making it a greatly balanced strong monster. Combined by team of Succubus, it will be both hitter and ATK reducer at same time.


3. Behemoth

Behemoth is a both great semi tanker and hitter. It can OHKO (1-hit KO) foes with high ATK and tank hits from foes thanks to its extremely high HP. So while being hitter, it can be placed at front-right to attack first and tank a hit, so it can do minimum of 2 attacks with great amount of power. Giving front line HP buff is really perfect for Behemoth.


4. Spirit Knight

Despite of its cool design, Spirit Knight is the first event monster which has a new skill, that is line skill. It decreases ATK of back line foes by 30%, starting at 8* form. The new line skills are imbalanced, so maybe it's the reason that GM made this skill growing from 5%, 10%, 20%, then finally 30%. So having strong Spirit Knight may take some time because you should make it to 8* to make it having normal line skill buff. Full -ATK back line will be a great threat for enemies who have decent ATK buff for back line monsters, so this monster will come in handy. Its stats, both ATK and HP are high, so it can be placed in front or back.


5. Gigas

This male monster may not have good looking, but he will be badass with 9* armors at last 2 forms. This monster has great skill which is needed by almost any team, that is 30% HP boost for front line monsters. Like Spirit Knight, he has growing skill from 5% HP boost to 30% HP boost starting at 8*. He has great HP too, perfect for front line tanker.


6. Marionette

This girl is someone to be scared of. She has high ATK and good HP, while having 30% ATK bonus for back line monsters. So she is counterpart of Gigas. She is a back line hitter. Same as Gigas and Spirit Knight, her ATK buff grows from 5% up to 30% at 8* and 9*. This girl, along with Spirit Knight are only monsters with all elements available.


7. Holy Dragon Maiden

One of the scariest event monster. She has the highest BP (25 while others have 23), so she has highest stat total among all event monsters. Not only that, she also has overpowered skill - the 70% sweeping damage to foes. She is the greater version of Squid (higher HP, higher star, but almost same ATK), and she is a White-element exclusive.